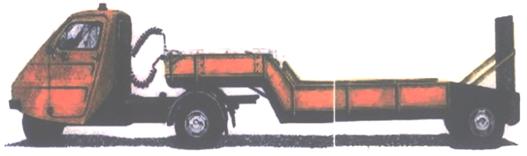
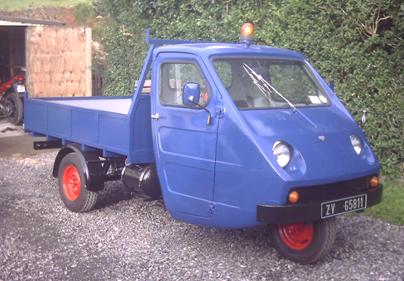
Having looked at
the history of Reliant and the
predecessors of the TW9, its time to move on forty years and look at
how I set
about making something useful out of a 37 years old vehicle that had
already
lived two lives. From a Road Sweeper to an artic! Whilst the changes
might seem
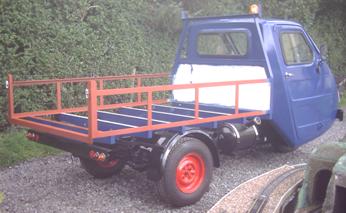
like the product of an enthusiast, in reality, BTB Engineering
converted many
ex-municipal TW9s and Ants into something else – like
pick-ups, tippers and
milk floats – such was the longevity of the individual
vehicles.
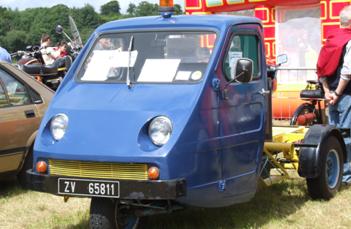
I
had seen the Ants on television when they were
first shown to the media but to be truthful, I didn’t give
them much of a
second thought. However, I became interested when I used to pass not
one, but
two, in a garden near where we used to live. What seemed remarkable to
me was
that the chap was converting them into tractor units to haul trailers.
I did
not know at that time that the concept had been tried before but I was
fascinated with their progress.
Time
moved on and so did I. I had forgotten
about the TW9’s and it was the furthest thing from my
thoughts when I was
invited to a transport rally at the Shipley Glen Tramway, West
Yorkshire. It
was my first visit to England for nearly three years so it was a
whirlwind-like
tour of relatives, friends and places. Vince Kitson, who had purchased
our
house, had extended the invitation and when we met up he told me he had
acquired an Ant and it was at the Keighley Bus Museum’s
premises.
I
managed to squeeze in a couple of hours on the
Monday evening to take a look at it. I realised there was quite a lot
of work
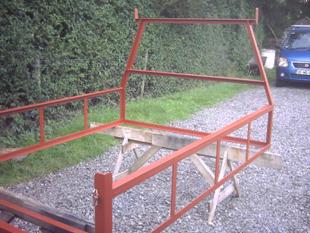
to do as Vince explained what he would like to do with it. Basically he
wanted
to build a trailer that looked like it was a haulier’s truck
but fitted out
internally as a camper van! As we postulated on the best way to go
about this,
he asked if I would restore it in Ireland. I eventually declined the
request
because of practical difficulties and heard no more about it.
However,
having tried to get the vehicle’s
engine running and failed, Vince was beginning to realise that it might
not be
suitable for his needs and he began to look for something else more
suitable.
Meanwhile, the vehicle was taking up space at the Bus Museum and also
costing
money in storage fees. In April 2007, Vince asked if I wanted it! He
would give
me it and even arrange for the transportation to our cottage if I would
take
it. Without any strings attached, I said yes.
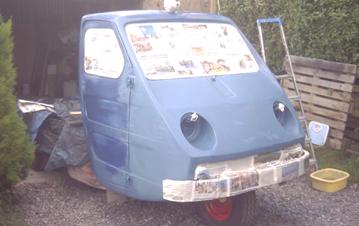
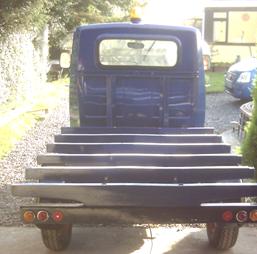
It
took over seven months for it all to come to
fruition (but it did!). Mid
November
saw me eject the car from the garage and my brother and I shoved the
Reliant
in. At that moment I wasn’t aware of all that needed to be
done but Martin
reckoned that the engine was complete and we could have the aluminium
head
skimmed, the cylinders rebored, new pistons, etc, etc. In the end it
did not
these precision machining jobs but it did need a lot of time and effort
in
determining why the engine would not run properly.
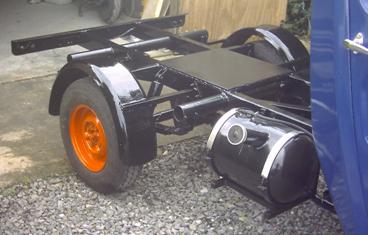
The
first real hurdle came with brakes (there
were none!). No
brake parts came across
with the vehicle. It took a few weeks to track down the correct type
and I am
grateful to Power Track in England. It turns out that the rear
cylinders were
originally fitted to Austin Somerset’s in the
‘fifties - whilst the front
cylinders were of early Hillman Imp type!
However, after I had ordered the back brake
cylinders, I decided to jack
up the front end of the vehicle. As the ‘Ant’ just
fits in my little garage, I
did not fancy working in the rain so the activity had to await a dry
day.
Imagine my horror when I found that there were actually no brake parts
whatsoever on the front wheel (or anywhere else as it turns out!).
Apparently,
when a new King pin had been fitted, the front wheel had been refitted
and all
the parts left in a cardboard box (which might still exist somewhere in
Bradford).
Without
front brakes, the vehicle could not be
driven on the road and I was left with the feeling that my troubles
were about
to begin. I knew that Power Track had the correct cylinders but nothing
else. I
phoned the owner, Paul Hobson, to ask him to include the front
cylinders in my
order and also told him of my plight. He promised to ring back if he
could
identify the type of brake shoe that Reliant had used. True to his
word, he
found that between 1968 and 1970, Ford had fitted them to their Escort
MK1 vans
and certain Estate cars. He regretted that he couldn’t supply
the shoes but I
will always be grateful for pointing the way ahead. I bid for a set of
Ford rear
shoes on eBay and, being intended for a four-wheeler, I ended up with a
spare
pair for future use! |